
Did you know that you can make grain free bread in a bread machine? Many think that with a gluten free or a gluten sensitive diet, the bread machine is no longer a tool that can be used. Not so! There are a few easy tips to enjoy this time and money efficient tool. Read on to get up to speed and re-incorporate this wonderful family-friendly machine. We use this grain free bread machine recipe because we can overload on the grain flours pretty quickly and the grain free helps alleviate the saturation point for the family’s system. Since these recipes are grain free and naturally gluten free, we make use of both terms in this article.
This post contains Amazon affiliate links, which means I receive a small commission to put in the school fund kitty, at no extra cost to you, if you make a purchase using links provided. Please see my disclosure page for more details.
What type of bread machine for grain free bread?
There are just a few key tips that will help you have better success using a grain free bread machine recipe. When picking out a bread machine, keep in mind the following points:
- Choose a bread machine that can make an extra large loaf (at least 1 1/2 lbs.)
- The bread pan should be a horizontal (wide) pan instead of a vertically tall pan.
- The bread machine should have the option for an “Express Bake” for shortened rising time. It might be listed as “Quick Bread” cycle option or even a dedicated Gluten Free cycle.
- The lid should be able to be lifted and opened while in the mixing phase. I don’t think this is a problem in most bread machines, but just in case, be sure that it doesn’t lock shut once it begins to cycle.
- There are many different machines that will do the trick and they do not have to be the most expensive ones on the market. Our all-time favorite was this model of the Oster bread machine and would recommend it to others.
How does grain free bread dough differ from regular gluten bread dough in the machine?
The chief differences in how the grain free bread dough will look vs. regular gluten dough are the wetness and thickness of the dough. One of the great pleasures of bread making is flouring up your hands and kneading dough and seeing it rest and rise. Alas, gluten free bread dough needs to be viewed more like brownie batter without the need to hand knead. The same holds true for using a bread machine. Even though it is normally desirable to see a ball of dough nicely being kneaded with the paddle for regular gluten dough, for grain free dough you want the consistency of brownie batter with the paddle freely moving through the dough, not dragging it with the paddle into a large dough ball.
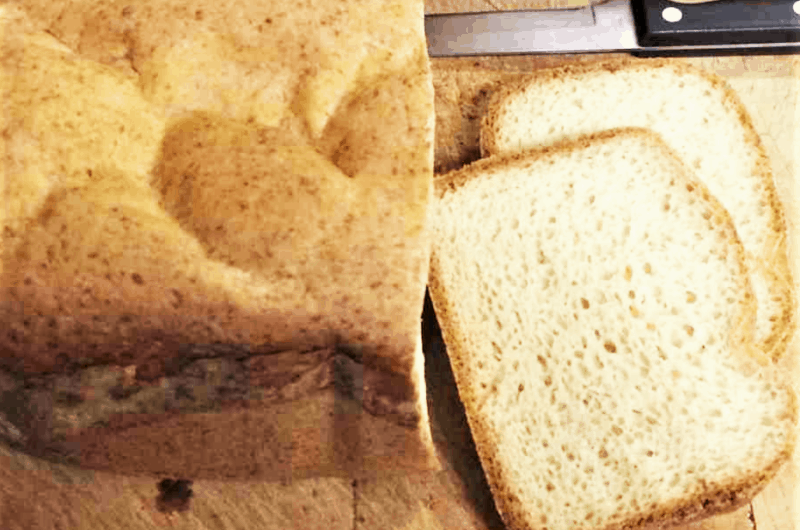
I have found that this one characteristic can be the deciding factor in the success rate of a good recipe for grain free dough. The difference between a dry hockey puck door stopper loaf of bread that sucks the joy of bread right out of you. To a beautiful soft, airy loaf of bread that makes wonderful sandwiches and toast. On the flip side, too much liquid in the batter, and you end up with a loaf that I like to call my “wreck it Ralph” bread. Still tastes good but has the form of a sunken center that can be quite entertaining to the young’ins.
Why use a bread machine for grain free anyway?
The main reason to use a bread machine for grain free bread is COST. As a family who goes through a loaf a day, this is a huge chunk of change in the gluten free world. Yes, the 2 pack of gluten free loaves at Costco are wonderful and we use them for fancy special traveling bread, but it is completely unsustainable as a regular budgeted item in our household. We go through a loaf a day- quite a habit.
The second reason is the same whether you are grain free or just gluten free– TIME. If you do not want to be chained to your kitchen just for bread, then make your bread machine be the daily hard worker for you. Without it, I am reduced to tears very quickly without this seemingly simple item for daily living.
The third reason: it gets your kids involved. There is a sense of accomplishment and practical knowledge gained from adding bread making to the chore chart. Putting a loaf in the bread machine is a skill that gluten free children may need as they become independent out in the world.
Can I add any extras?
The following grain free bread machine recipe is great on its own or with added extras. Sometimes I like to add sesame seeds and sunflower seeds during the mix cycle for a nice variation Sometimes, some roasted red pepper and basil is a great addition. Cinnamon, raisins, and a little brown sugar is a great breakfast bread. Orange oil and fennel or caraway would be an experiment I would like to try.
Simple Everyday Grain Free Bread Machine Recipe
- 1 C. Warm water
- 3 Eggs
- 1 Tsp. Cider Vinegar
- 2 Tbs. oil (I use olive or avocado oil)
- 1 1/2 C. Almond Flour
- 1 1/2 C. Tapioca Flour
- 1 Tbs. Active Dry Yeast
- 1 Tsp. Xantham Gum
- 2 Tsp. Sea Salt
- 1 Tbs. Psyllium Husk
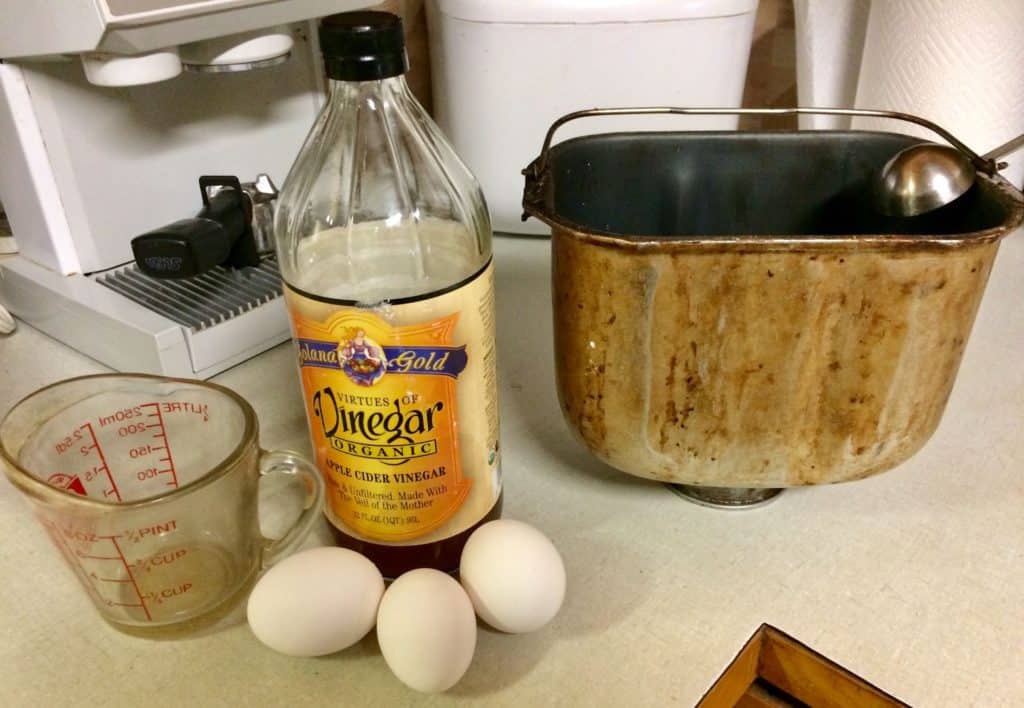
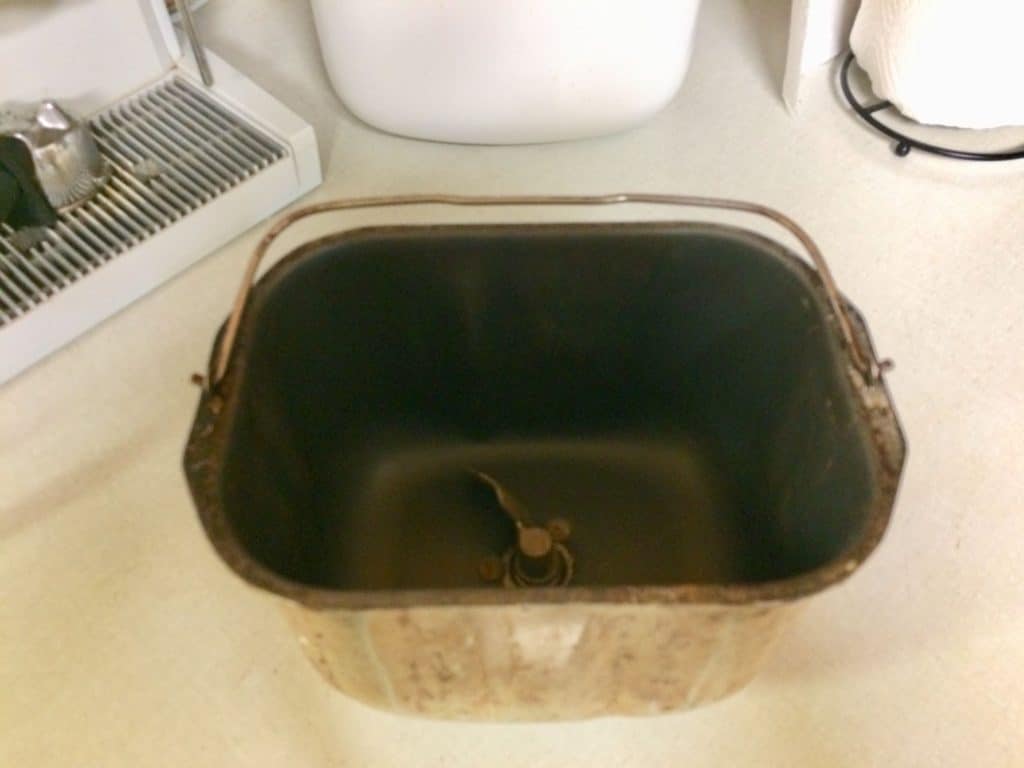
Put the paddle in the pan and give it a nice twist to test that it isn’t stuck. Add the warm water, vinegar, oil, and eggs to the bread pan.
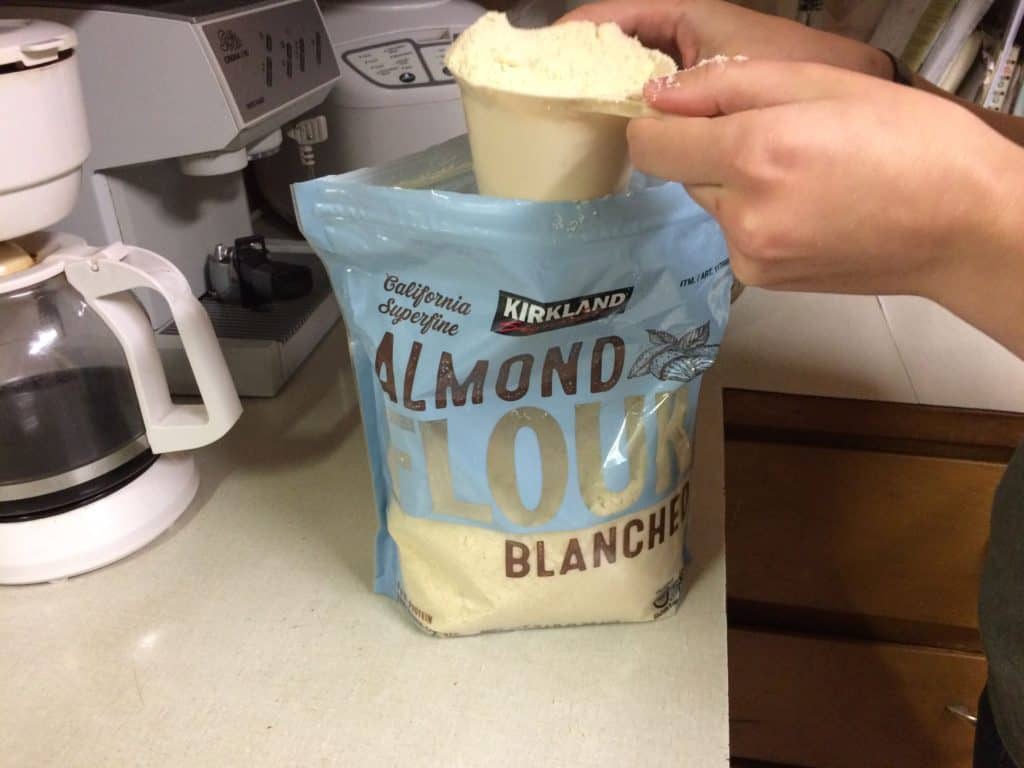
Lightly fill and level the almond flour and tapioca starch then add to the pan. Do not pack the flours into the measuring cup.

Xantham gum is the “gluten” replacement in this recipe.

Add xantham gum, yeast, salt, and psyllium husk on top of the flours in the pan. When your pan is in the machine, select the express bake or gluten-free bake option.
While your bread machine is mixing, be sure to use a rubber spatula and scrape the corners. This will make sure you don’t have any hard tapioca lumps gathered and baked in the corners.
Tips for checking your dough:
- You will notice that the dough has a brownie batter like consistency. If you notice the paddle dragging the dough into the beginnings of a ball, add a little bit of liquid to thin it. The goal: to have the paddle be able to move freely but not have the dough so thin that it flows off your spatula.
- You will have a loaf of bread that has a paddle hole in the bottom after it is baked. To avoid this, reach into the dough and remove the paddle after the machine finishes the mixing cycle. We usually don’t mind the paddle indent in the bread. I usually use those middle pieces for breakfast toasted bread with egg in a skillet.
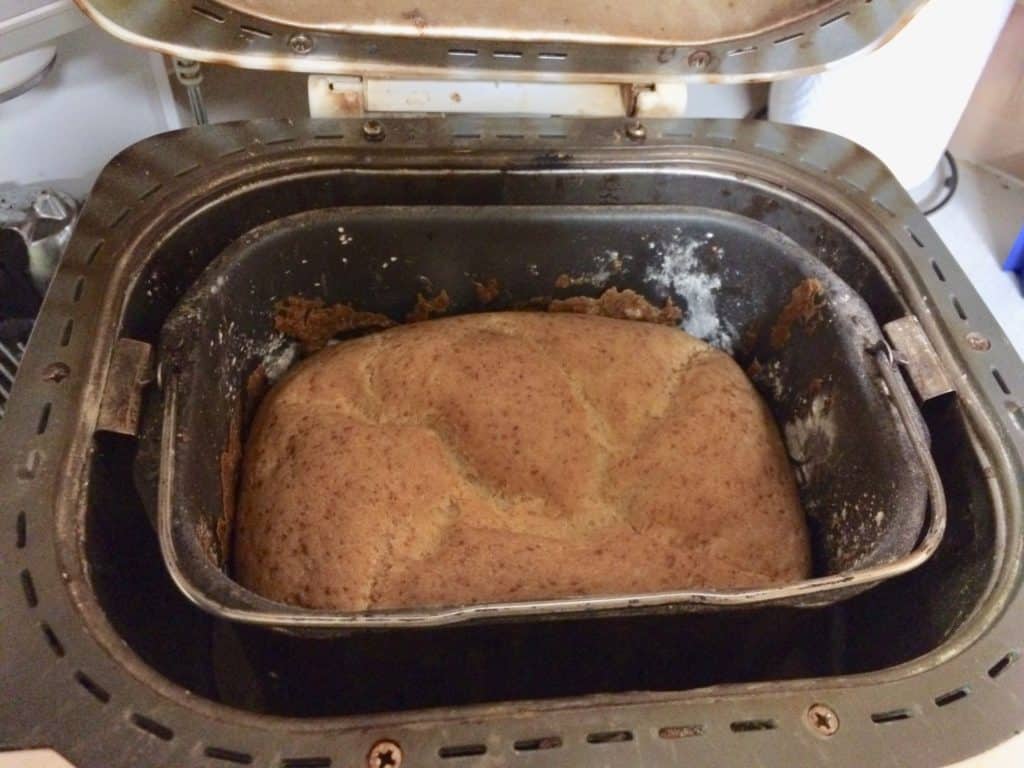
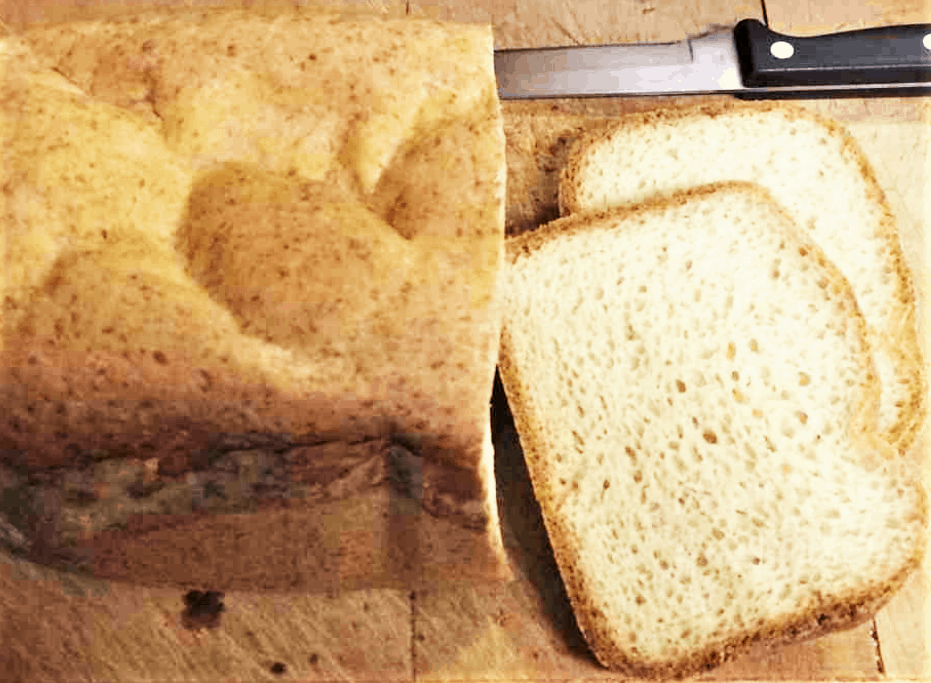
When your machine is done, remove the loaf pan with an oven mitt to protect your hands. Invert the pan with a second oven mitt. Shake out the loaf onto a plate or cutting board and allow to cool before slicing. I usually cover the loaf with a towel overnight and slice in the morning. If the paddle stays in the bread, you can remove it after the bread is cooled.

The key to cutting this bread is to wait until it is cool.
Store the bread in the freezer and remove what you need as you need it. Gluten-free bread will get mealy and stale quickly if not kept in the freezer– don’t be tempted to leave it out on the counter. Note: those staler pieces are great for croutons, bread pudding, or stuffing.
Beautiful Grain Free Bread Machine Recipe
Course: Gluten-Free Cooking, Home and HearthCuisine: AmericanDifficulty: Easy6
servings15
minutes40
minutesEasy and cost-effective for a whole family, this gluten free bread is a versatile work horse.
Ingredients
1 C. Warm water
3 Eggs
1 Tsp. Cider Vinegar
2 Tbs. oil (I use olive or avocado oil)
1 1/2 C. Almond Flour
1 1/2 C. Tapioca Flour
1 Tbs. Active Dry Yeast
1 Tsp. Xantham Gum
2 Tsp. Sea Salt
1 Tbs. Psyllium Husk
Directions
- Add the warm water, vinegar, oil, and eggs to the bread pan.
- Lightly fill and level the almond flour and tapioca starch then add to the pan. Do not pack the flours into the measuring cup.
- Add xantham gum, yeast, salt, and psyllium husk on top of the flours in the pan.
- Select the express bake or gluten-free bake option.
- While the bread machine is mixing, be sure to scrape the corners and edges.
- Remove the loaf pan with an oven mitt, Invert the pan, shake out the loaf onto a plate or cutting board and allow to cool before slicing.
- Store the bread in an air-tight container in the fridge if you plan to use it up in a day or two. If not, store it in the freezer and remove what you need.
Notes
- You will notice that the dough has a brownie batter like consistency. If you notice the paddle dragging the dough into the beginnings of a ball, add a little bit of liquid to thin it. The goal: to have the paddle be able to move freely but not have the dough so thin that it flows off your spatula.
- You will have a loaf of bread that has a paddle hole in the bottom after it is baked. To avoid this, reach into the dough and remove the paddle after the machine finishes the mixing cycle. We usually don’t mind the paddle indent in the bread. I usually use those middle pieces for breakfast toasted bread with egg in a skillet.
- Macro Breakdown in a 12 slice loaf: Calories per slice– 347, total fat 25.7g per slice, saturated fat–3.4g per slice, carbohydrates—25.3g per slice, dietary fiber– 9.3g per slice, sugars 0.7g per slice, protein–9g per slice. According to VeryWellFit Nutirtional Analyzer.
I am trying your recipe but it seems very liquid. I have made other grain free breads that were much thicker. I was very careful with measurements. Question is this suppose to be a tight dough or looser like cake batter?
It should only be wet enough to allow the paddle to move through the dough without it balling up like traditional bread. It should be closer to a brownie batter consistency in thickness. Start with less water and add more as needed during the stirring phase to loosen the dough from the paddle. I find that different days, the water needs to be adjusted: sometimes from humidity, psyllium brands, etc.
Thank you for sharing this!! I have made it so many times with many variations. Not one person hasn’t liked it!
So glad to hear! Thank you for the feedback!
Simply THE BEST!
I’ve tried many recipes for basic good-tasting, gluten free bread.
This is it
So glad it’s working for you! Thanks for the feedback.
Need help!
The recipe is delicious BUT first time through it came out with a giant cavern in the bottom and middle…what did I do wrong?
Here are a few tips:
1. My first guess would be just a tad too much liquid. Whenever I have that happen, I call it wreck it ralph or tron bread:) Maybe try just a little bit less water and see if it helps.
2. It could also be the proofing cycle is too long compared to the baking cycle. If using a tad less water doesn’t help, you can experiment with different cycles on your bread machine. I found that I need to use a different cycle to bake longer than the one labeled “gluten free” to get a better rise.
3. If your bread is also accompanied by a gummy center and doing the above two options is helping but not fully, you could substitute psyllium husk powder for the xantham gum. Since the recipe already calls for it, you could either leave out the xantham gum or leave it out and add an extra 2 tsps. of psyllium in addition to the TBS. in the recipe.
Please let us know what works so that it helps others who might have the same issue since each baking environment is different.
Becca, what is the calorie and macro nutrient content-Protein, Fat and Carb’s for a serving of this bread? Thank you.
Becca, what is the calorie and macro nutrient content-Protein, Fat and Carb’s for a serving of this bread? Thank you.
Patricia, here is the breakdown: Macro Breakdown in a 12 slice loaf: Calories per slice—- 347, total fat 25.7g per slice, saturated fat—-3.4g per slice, carbohydrates—–25.3g per slice, dietary fiber—- 9.3g per slice, sugars 0.7g per slice, protein—-9g per slice. According to VeryWellFit Nutirtional Analyzer. These are listed at the bottom of the recipe card in the notes section so you don’t have to write it down.
Hi, well I want to thank you for this awesome recipe. I’ve made it probably 60 times now and it’s perfect every time. I started adding 1 tablespoon of honey just because it makes the outside brown a little bit more. I had no trouble with it raising even when I did not add any type of sweetener. It’s really been perfect every time. I’ve made it with all kinds of different things raisins, nuts, dates, etc. etc. My husband who is not grain free also absolutely loves this bread. My favorite go to at the moment. Is plain with honey added and sesame seeds across the top. Thank you so much for bothering to post this recipe. It really has been a lifesaver for me. Before this, the different recipes I was using for bread were usually like rocks by the next day and they really weren’t appropriate for sandwiches. This one is perfect. And I double the recipe for my machine and we usually eat a loaf within two days lol.
Wow! I am so glad it works for you–great tip on the honey! Thanks for sharing that. I love the idea of the sesame seed idea and will have to try that.
I have made this maybe 40 times now. I’ve given it as a gift several times. Everyone loves it. What an excellent recipe. It really was a game changer to finally have a wonderful in every aspect, sandwich loaf recipe. Lol I’m making a loaf right now. My hubby is so spoiled with this, he wants no other. I actually double the loaf and he can eat his nice big sandwiches.
Thank you so much!
I am so glad to hear this- thank you! Recently, I saw that Franz was making a gluten free sourdough loaf. What they did was to turn a regular-sized small gluten free loaf and cut it longwise to equal a large sourdough slice. Might have to give it a go and see what my family thinks of slicing that way for larger sandwiches.
Like Aleli de Asis, I substituted golden flax seed meal for the psyllium husk and 2 tsp unflavored gelatin for the xanthan gum. I’m on a paleo diet, and Xanthan gum is not allowed.
The first time, I noticed the mix was too thin. I added another ½ cup each of tapioca flour and almond flour. It still seemed a bit thin, and during baking, it deflated, but it tasted great. However, it seemed a bit too moist.
The second time, in addition to the extra half cups of tapioca and almond flour, I added ¼ cup of coconut flour because it absorbs a lot of fluid. I finally got the perfect thickness. It didn’t raise as much as the first time, but it didn’t fall. So I consider that a win. Again, the taste is great.
Excellent! Thank you for experimenting and letting us know the edits. It will be very helpful to others.
I can’t have nuts. What can I substitute for the almond flour, grain and nut free. AIP compliant.
You might consider a grain free sourdough bread recipe. Heal Me Delicious has a wonderful looking recipe: https://healmedelicious.com/aip-sourdough-bread/ that avoids almond flour, nuts, grain, and is AIP compliant.
I absolutely love this bread. It is the first loaf of gluten free bread I’ve made that isn’t dry. Also, since making this I have more or less discovered that grain free is a much better way for me to be. Thank you so much for this recipe. I have made 4 loaves and the all are just like “regular” bread, even my husband loves this bread.
I am soooo glad you are having success and liking the bread! Thank you for letting me know!
I substituted xanthan gum and psyllium husk with flaxseed and the dough was runny. When the bread machine finished the bread actually taste good! I wish I added cheese. Cannot say it failed completely with the substitute, we will see how it is when cold. I will give an update. Thanks for this recipe!
Glad you are trying an experiment. Maybe once you get the liquids and the runniness adjusted, you may have a winner. Yes, please keep us updated! We are forgoing eggs and xantham right now and are experimenting with aquafaba as well.
Baked it looked beautiful, rose, nice brown crust , let it cool and it shriveled up. When I cut it open it was a hard glue like substance and hollow in middle. Never saw anything like that before. Expensive project.
Sorry to hear that it was a fail! I know the frustration! The hard glue like substance would probably be the tapioca. I have had tapioca blobs for a couple of reasons that might be something to check:
1.When I forget to stir the corners in a bit during the paddle stirring.
2. I have had the paddle slide up the post and not fully stir the dough in the middle at times if I didn’t push it in all the way at the beginning.
3. Similar results to what you describe as well when the post of the paddle wasn’t moving or was stuck too tight for the paddle to spin during the stirring cycle. I always give it the paddle a little twist back and forth before I put ingredients in to be sure it isn’t getting stoved up.
Don’t despair, if you try again you can let us know how it turned out.
Wonderful! I have been looking for a good grain free “sandwich, bread”. This is very good, also makes excellent toast. My other grain free bread recipes, although good cannot double as a sandwich loaf or for toast. I made it just like as instructed and with a bread machine to boot. Zero complaints here. Thank you for your recipe. I made it at least 25 times now., at times throwing in raisins, etc. lol I’m making it now. Also hubby loves it.
Thank you so much for the feedback. Glad it’s working for you. I keep forgetting that to add in extras like the raisins–will have to try that next time.
Hi I tried this bread in the bread machine. I used the gluten free option. The outside was crisp when it came out but it deflated a bit and then became quite soft in texture. Somehow I felt the inside was on the eggy (taste and look) side and a bit dense. Do you think it might work to have one less egg in the mixture? Or maybe use two eggs and the chia gel substitute? Otherwise it is a simple enough recipe and delivers quite good bread especially when toasted.
Yes, you can experiment with the egg amount but you might consider trying a different baking cycle. In one of the bread machines I have used, the gluten free cycle was too short and made a loaf similar to how yours turned out. You might consider a cycle with a little longer baking time as well.
Are there replacement options for 1 Tsp. Xantham Gum?
Substituting takes a bit of trial and error to find that sweet spot. I would recommend experimenting with a dual sustitute:
1. Trying a half mashed banana or replacing half the water with yogurt (just add a bit of water if needed during the paddle stir phase to get the equivalent thickness of dough if your yogurt is really thick)
2. Add an extra egg or use chia or flax gel. Chia and flax gel can be made by putting a tablespoon of chia seeds or ground flax seeds with 3 Tbs. ot water and let it soak and gel up for a few minutes.
Good luck and please let us know if you hit on a great balance to your taste liking.
I was wondering what the nutritional value of this bread is? I would like to know how much protein?
According to VeryWellFit Nutritional Analyzer: 9g of protein per slice of a 12 slice loaf.
Can I mix it myself and bake it in a regular oven?
Yes, I sometimes make this in loaf pans or as hamburger buns or breadsticks. You would want to let the yeast and warm water with a tablespoon of sugar bloom while you mix up the rest of the dough then add the yeast water. Form into the shape you are making, let rise for about 30 minutes and then bake at 350 degrees until golden and internal temperature is between 180-200 degrees. Cooking time will very depending on shape and pan.
Hi Jessica, I love this bread so much that I was thinking of trying to make buns out of it. Is the dough thick enough to mold into buns when you add the bloomed yeast separately? Would you need less water?
I have made buns out of this dough but I used English muffin rings to hold the dough in place. When I have made them this way, I mainly used them as hamburger buns and put sesame seeds sprinkled on top before baking. If you are thinking more of dinner roll style, you might try sprinkling the dough with almond flour and forming into balls with your hands before letting the dough rise. The generous dusting of almond flour to keep it from sticking to your hands may be enough added dry ingredients to help keep their shape or you could use a little bit less water.
Hi , can Psyllium husk powder be use instead of the whole husk ? Thanks for the recipe !
Yes, but since it is going to be more concentrated- you may want to lower the amount to 2 tsp. instead of a whole tablespoon to start and see if it is the right result for you. Hope you get a great loaf and feel free to let us all know what amount of the powder version worked for you.
Have you done with recipe in grams? I usually like to weigh my flours. Thank you!
I have not and I have heard that weighing can be more consistent and a great suggestion to incorporate.
This was the very first recipe I tried in my new (first ever) bread machine.
We try to eat grain and gluten free as much as possible as it’s just a healthier lifestyle. The commercial breads out there are too expensive or leave much to be desired in taste/texture and some even have harmful ingredients. So, I was happy to find this easy recipe when I decided to add a bread machine to my life!
I added the sugar as suggested in the comments. My bread did not look anything like your photo once baked, but similar when sliced. That didn’t cause concern though. It had a nice texture, aroma, and beautiful little nooks and crannies that I personally loved. The taste was very similar to sourdough in my opinion, which was a bonus since I love sourdough! This recipe is a keeper and I will be making this weekly for my household…thank you!
I am so glad you liked the taste! Yes, I agree the sugar is a good addition.
Thank you so much for this recipe! I have a new Zojirushi gluten free bread machine and I’m grain free in addition to being celiac (so must be gluten free), so I was very excited when I found your recipe! I only added sugar to the recipe and it’s otherwise perfect! I actually multiplied by 1.5 to get a bigger loaf once I saw how good it was because my kids are devouring it now, too! YUM! Everything is perfect! I can add cinnamon and raisins sometimes and it turns out delicious, too! YAY!
Glad to see that the sugar recommendation from another comment was helpful and that you are enjoying it! I will have to try the cinnamon and raisins next time- sounds delicious.
I am so so grateful for the grain free recipe! Can’t really convey how much. THANK YOU!
You are so very welcome! Glad to hear you are enjoying the recipe.
I see you deleted my message that I wrote on before. Why is there no sugar to help with yeast. I followed the reciepe but mine came out only 2 inche high and it had no tasted awful.
Lesley, I am sorry that you did not have success with the recipe. You can definitely try 2 TBS. of sugar to help the yeast. Gluten free baking is always a tricky process, even the weather can affect the outcome.
I am looking forward to making this. When you say “yeast”, are you referring to active dry yeast, nutritional yeast or some other kind of yeast? That seemed like alot of active dry yeast so I wasn’t sure. Thanks!
Hello Ellen, thank you for your question. Yes, that is active dry yeast– 1 Tablespoon or 1 packet of active dry yeast per loaf. I will clarify this on the recipe card for other users as well;)
Hi, would love to try this recipe. I’m new to the bread machine and mine asks for loaf size. Would this recipe be 1, 1.5 or 2 pound loaf? Thank you
This would be labeled as a 1.5 lb. loaf
I am wondering why the pan needs to be the horizontal style for grain free breads? Any thoughts? Thank you 🙂
Brandi, you definitely can use an upright bread pan design. I recommend a horizontal design in the article mainly on personal experience. In the years of using a bread machine, I have had more consistent success with that style. When I used the tall style it was never a given that the loaf would come out as risen or not. If you have access to a bread machine and it has a tall style, I would still use it because of it’s help in time management. If you find that you have success with it, please let me know, I’d love to hear;)
I just scooped up a gently used bread machine with the sideways insert. Within a couple hours we had our first loaf! Super yummy but unfortunately it was underdone. Since we didn’t know our new machine yet, we placed it in the oven and cooked it some more.
Today I made a second loaf and again it was not fully cooked. I figured out how to just “bake” it some more but was just guessing on how long and what temp.
I hate to go buy a new machine…Do you have any idea what temp your machine is baking your loaf at? And how many minutes? thank you!
When I used the Oster 5838 Express Bake (my favorite machine so far), I chose the 80 minutes Express cycle. The shorter 58 minutes cycle was too short and it wasn’t fully cooked. If you are using a different model of bread machine, you may need to experiment with the cycles or add time to compensate. Even if it says it’s a gluten free cycle doesn’t necessarily mean it’s the right choice. For the model I had in the past, I had to use the quickbread setting. For the model I have now, I use the cake/quick cycle which cooks for 1 and 1/2 hours instead of the gluten free option which bakes for 2 1/2 hours .
I have not been able to locate any mention of a specific temperature that the bread machine is baking at though so am not much help on that aspect. Bread machines operate on a totally different baking temp then oven baking since they use steam as a baking factor. Your machine may need to have the ingredients at room temperature and the water closer to 125 degrees when you put it in the machine in order to be more successful.
All that to say, bread machines are like a getting to know a new car and handling it the way it likes and the results you want. It all takes getting to know it and then you have it down. If you nail it, please let me know what model you are using and what you found to be the right setting so we can all benefit from your experimenting. I would love to hear the results.
Wondering if I can use and egg replacer?
I have used flax gel in this (3 TBS. flax and 6 TBS. hot water and let sit for a bit). It works but isn’t the same texture and chew. I have not tried aquafaba in it so far– I would expect that it would be a chewy much denser bread if you use. Please let us know what you use and the results so others can know;)
Can you replace the tapioca with oat fibre for a keto version?
Oat fiber and tapioca are two different “beasts” for sure. I have not been successful replacing the tapioca with oat fiber straight across. You would need to play around with the liquid amounts to make up for the absorbing factor of the fiber and maybe the eggs. If you try it and are successful, I would love to know so that I can use up my extra oat fiber in a better way.
I made this bread and wow it is good, moist and one of the beast breads I’ve made. I cannot believe that healthy bread can be so good. Thanks
I am so glad you had success and liked the results! Thanks for letting us know.