
Don’t have a pressure canner? Neither do we and quite frankly they scare me-haha! Canning tomatoes without a pressure canner is straightforward and simple. Beautiful jars of tomatoes ready for those high winter tomato prices is a wonderful thing. Especially when you LOVE tomatoes and go through them like there’s no tomorrow. Read or watch on to see how we did our tomatoes this year. Since I am not an exert, so please be up to date on proper procedure if you choose to can your own tomatoes. Steps for canning tomatoes without a pressure canner can be found at the USDA canning recommendation site.
This post contains Amazon affiliate links, which means I receive a small commission, at no extra cost to you, if you make a purchase using links provided. Please see my disclosure page for more details.
Canning tomatoes takes time.
First of all, I made sure I had the appropriate time available. Once we started the canning of the batch, I sure didn’t want to have to stop right in the middle. Each time I was going to can, I made sure to have enough for a batch for at least 4 jars. An open afternoon where we wouldn’t have to head to town on errands is a must.
Equipment needed
Here is a list of what I used for jars of tomatoes:
- Hot water bath (you can find these at yard sales, Craigslist, stores like Walmart)
- Large stock pot big enough to fit a jar laying on it’s side if you don’t have a dishwasher.
- Jar tongs (you can find these at the same stores as the hot water bath)
- Canning jars, lids, and rings
- Canning funnel
- Citric Acid or lemon juice (Citric acid is found in the canning sections of the store)
- Non-iodized Salt / Pickling Salt (baking aisle with the salt)
- Large bowl for ice water bath
- Medium bowl for peels
- Colander strainer for rinsing tomatoes
- Ice cubes for ice bath
- Ladle and pairing knife
Part 1: Prepping and blanching for canning tomatoes

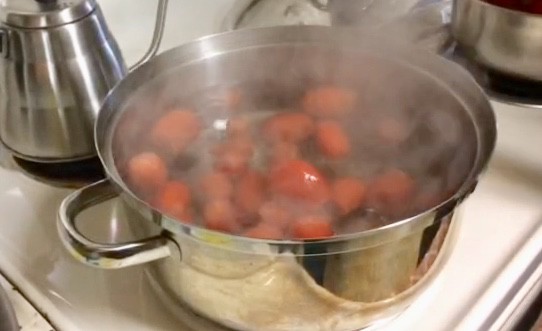
First of all, we started with tomatoes that were fresh. The mushy or blackened tomatoes were culled out for compost. Next, we washed the tomatoes to get the dirt and dust off them. Cut off the stem end as well as any other areas that were deeply scarred. Meanwhile, a large stock pot was put on the stove filled halfway with water to start boiling.
Once we had a mixing bowl full. The tomatoes went into the big pot of boiling water for blanching. A large mixing bowl was set to the side of the oven filled halfway with cold water and a tray of ice cubes. This is a very quick step, boiling the tomatoes until we saw the skins split or wrinkle. They were quickly ladled into a large bowl filled with cold water and a tray of ice cubes.
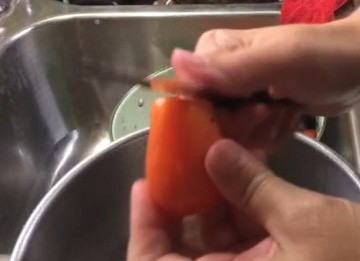
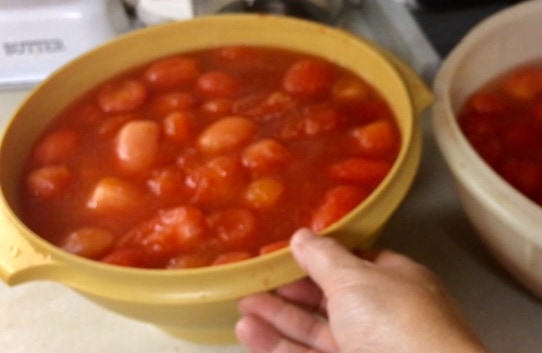
Next, the cold tomatoes were then gently squeezed and popped out of their skins. Put into a large bowl, and covered with water. The next batch coming from the boiling water into the cold water will probably need more ice cubes.
If you have help, one person can be washing and cutting up another bowl of tomatoes. Another person is blanching batches of tomatoes. Repeat this process until you have your large batch of tomatoes all done and waiting in the bowl covered with water.
Step 2: Prepping jars
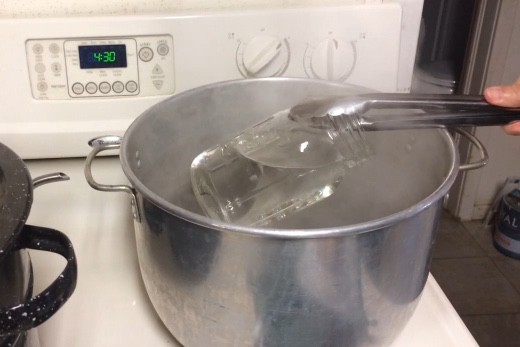
Now that our tomatoes were blanched and ready to be canned, we cleaned up the bowls and blanching stage. Next, we took out the hot water canner and large stock pot for sterilizing jars. We don’t have a dishwasher so we have to boil the jars instead. If I had a dishwasher, I would just run the jars and ring through the sanitize cycle of the dishwasher prior to starting tomatoes.
The large stock pot was filled halfway with warm water and set on the oven to boil. Meanwhile, I got out jars, rings, and new lids. I “shop” the fruit room for clean empty jars. Run my finger over the lip to check for nicks, chips, or cracks. If I find a jar with such a mark on the lip, I use a Sharpie and draw an X on the bottom of the jar. This jar is set aside for crafting or as a flower vase. It can’t be used for canning and is retired.

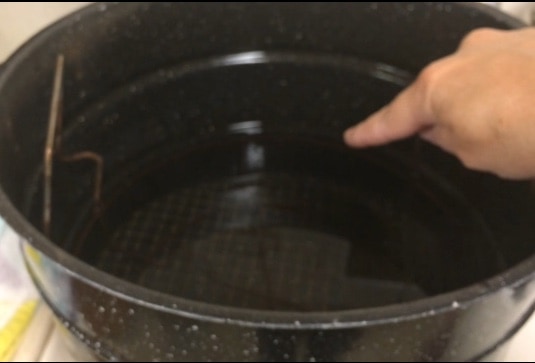
Step 3: Hot Water Bath to Can Tomatoes
The hot water bath canner is now filled 1/3 full of the hottest water from the sink. Then put on the oven at low/ medium to warm up halfway and wait.
The usable jars and rings were put into the boiling water to sterilize for a moment or two. I took long tongs to gently drain some of the hot water out of the jars. Note to Self: keep the jar from tilting too much as to avoid hot water travelling down the tongs to my hand. I don’t forget to use an oven mitt to grab the end of the jar and take over emptying the water. Gently put the jars and the rings on a towel to cool and wait. I used a clean bath towel doubled up.
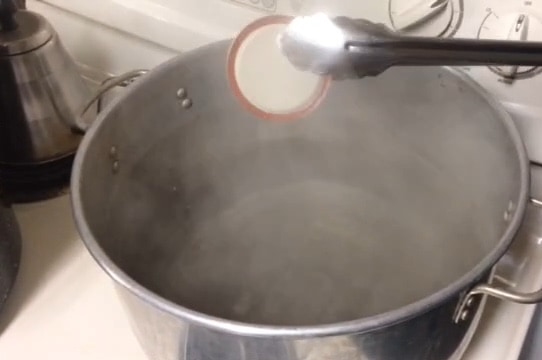
The new lids were quickly dipped into the boiling water with the tongs and set on the towel to wait. The waxy seal in the lids is now warmed up and waiting. I would never just sit the lids into the boiling water as we don’t want the seal to melt.
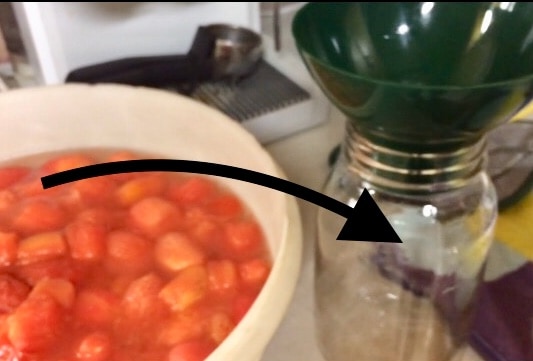
Step 4: Filling and processing jars of tomatoes
Each jar that I fill gets 1/2 tsp. citric acid and 1 tsp. pickling salt before adding any tomatoes to the jar.
Using the canning funnel in the mouth of a jar, I fill the jar to the level of the curve in the jar. with mashed or roughly diced tomatoes. The lip of the jar gets wiped with a clean cloth or paper towel and the new lid and ring put on the jar. The ring didn’t need to be tightened very hard on the jar, just until the ring “caught” enough to stay in place.
Each filled jar was then put into the hot water bath canner. If I didn’t get 7 quart jars to fill the entire bath, I just filled an empty far with warm water without a lid to fill the blank spaces in the hot water canner. When the hot water bath canner is filled, jars were covered with water. There is still enough head room in the canner so that the water didn’t boil over.
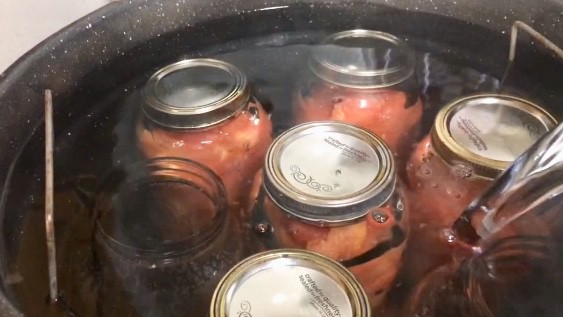
To process: I just put the hot water bath canner on and turned the heat up to high until a rolling boil. Turned down the heat to medium and let simmer for 40 minutes.
Step 5: Cooking and sealing the jars of tomatoes
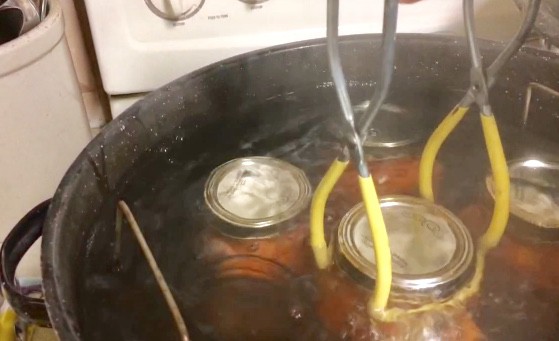
When the timer was up, the heat is turned off, canner tongs are used to gently removed each jar and let sit undisturbed on our layered towel.
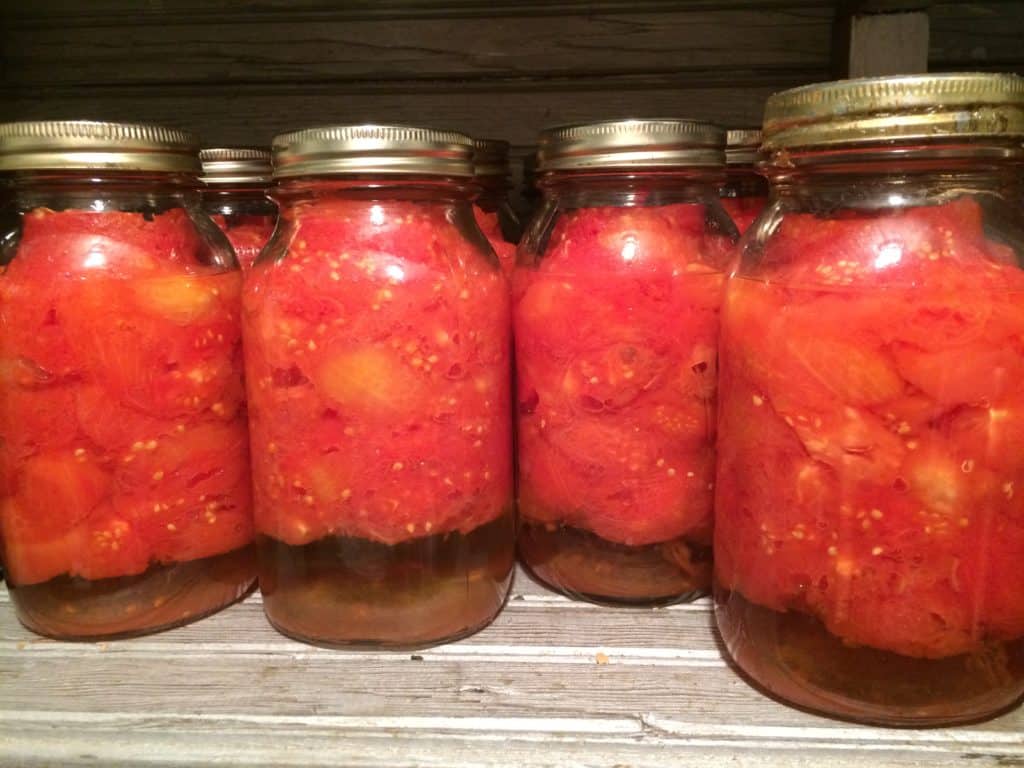
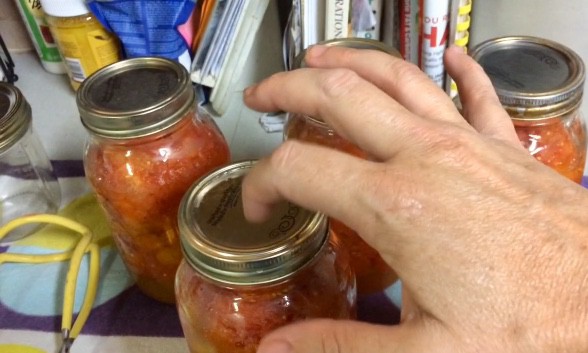
Each jar had breathing room around all sides. The pleasant sound of “pop” is a wonderful sound to here as the jars cool and seal. The ring needs to be tightened a little since it cooled and is loose. I leave the properly sealed jars overnight before moving them to the storage room. The tell tale tap sound on the lid will let me know if the jar had properly sealed. There is usually one jar that doesn’t seal, I could immediately wipe the jar lip and put a clean new lid on it and reprocess or just put it in the fridge and use for dinner. And voila! You have just done canning tomatoes without a pressure canner!
I’m much less intimidated by canning, now. Thanks!!
I am glad you stopped by, thank you for the positive feedback;)
I would love to get into canning one day. For now, it’s a little bit too time-consuming for me. But I love all you did here and the step-by-step.
Thank you for the feedback. Yes, canning is something that I have put on the back shelf while the kids were younger. Only now am I attempting it again with their help;)